From Floor to Roof
This post is to show what got done in one week. We went from having just the foundation and floor on Monday to have the walls up, the rafters in, and the roof on by Friday! Since it rained hard yesterday, it wasn't worked on today and probably won't be tomorrow.

Like I said, we had this Monday - The foundation and floor. A bit of a side note - Our Siamese tom cat, Sammy, will sometimes crawl through the openings you see on the right side, and spend most of the entire day down in the dark sleeping. If he hears us out there working in the afternoon, he'll hop out and then shake his head and wander around blindly because he's been in the dark for so long. It's something to watch!

After the walls were put up, then came the fun part of lifting the rafters into place on top of the walls.


And here's what it looks like today! The roof is on, walls are up, and rafters are in.

For now, the rafters are covered in plastic wrap to keep the dust and water off.


Here's the pretty view from the new room where we can see the river behind the house.

So it isn't even close to done, but it's coming along quite well. Like I said in the first post about this project, it's just too much fun not to share!
Ashleigh
Rustic Boxcar Timbers and Plates
Now for the next part of the project: Making the rafters! It started out with making the metal plates. We cut cardboard templates out and then I would trace them onto some hard-board a half-inch smaller than the original cardboard template. They'd then be cut out using the plasma cutter. After that, they were cleaned up a bit and painted!

Several coats of both paint and primer ensured that these babies would look good in the end.

The finished products! (Yep, all of these would be used on just two rafters!)

Then came the measuring and cutting of the wooden beams. That took awhile… And also alota math! I stuck around in the house during most of that process, so I don't have many pictures of it.

And then in the end, one of the two rafters. After this picture was taken, they were sprayed with polyurethane several times to seal them and give them a little darker look.
The next step: Floor and Walls
Ashleigh
Tree Removal and Footings
In this part of the project, we were cutting down the trees behind our house and then pouring the footings for the wall foundations. (I just sound so builder-like there!)

This tree had been here for many, many years. At one point, it was split in half and about to fall down. So we didn't lose it, a gigantic log chain was put around the two halves, holding them together.


Of course, no project is complete without a little supervisor….


Turns out, it was a good thing we cut the old tree down. It was completely rotten in the middle!

After the tree was down, a super great crew we hired dug the footings out. We actually learned that we only have a few feet of top soil on top of solid rock! So it made the digging rather difficult.

Once again, the little supervisor.

Unfortunately, I have no picture of when the footings were finished...

The next step in the project was to cut a hole through the concrete wall into our basement. This was to make a crawl-space. I can't say I've ever heard a louder racket than that of a concrete saw!
The next part of the project: Rustic Rafters
Ashleigh
Old Boxcars and Timbers
Over the past few months, we've started adding onto our house a great big living room. I was planning on taking pictures throughout the entire project and then posting one post at the end of how it went together - But it seems that I have no where near enough patience to wait until then to share pictures! So, I'm going to post pictures of what we so far (in two or three different posts) and then continue to update until we're done! I have to say, this is soooo much more fun than waiting until the end!
So, I better start at the very beginning. That means going back to November of 2013. A friend kindly agreed to let us have the wooden beams under an old train boxcar if we would get them out and help clean up afterwards. Here's how it went down:

It started with me seeing this view for several miles. Person A drives the wheel loader, Person B (that would be me!) drives the truck.

Here's what we saw when we got there. The trees around the cars had been cut and chopped, and now it was up to us to clean up the cars.

After a lot of cutting and breaking of chainsaw chains, we started to see some light at the end of the tunnel. AKA, we could see the beams.

The floor was cut out of the cars and then the cars were lifted up and taken to a burn area.


This was the sweet, dear little can of magic that got me through that day!

Here's where it gets down to the nitty gritty of the age of our beloved wood beams. This patent date says 12-11-17. So, we're figuring that if the car was built in 1917, the trees that the beams are from had to be cut down before that. And to make it all a little more confusing, we've counted over 80 rings in the beams! If there are over 80 rings in a beam alone, imagine how many were in the tree! We're thinking these babies are probably pretty ancient….

After we cut the floors out and removed the old cars, we stacked the two floors together and went back later with a trailer to haul them home.
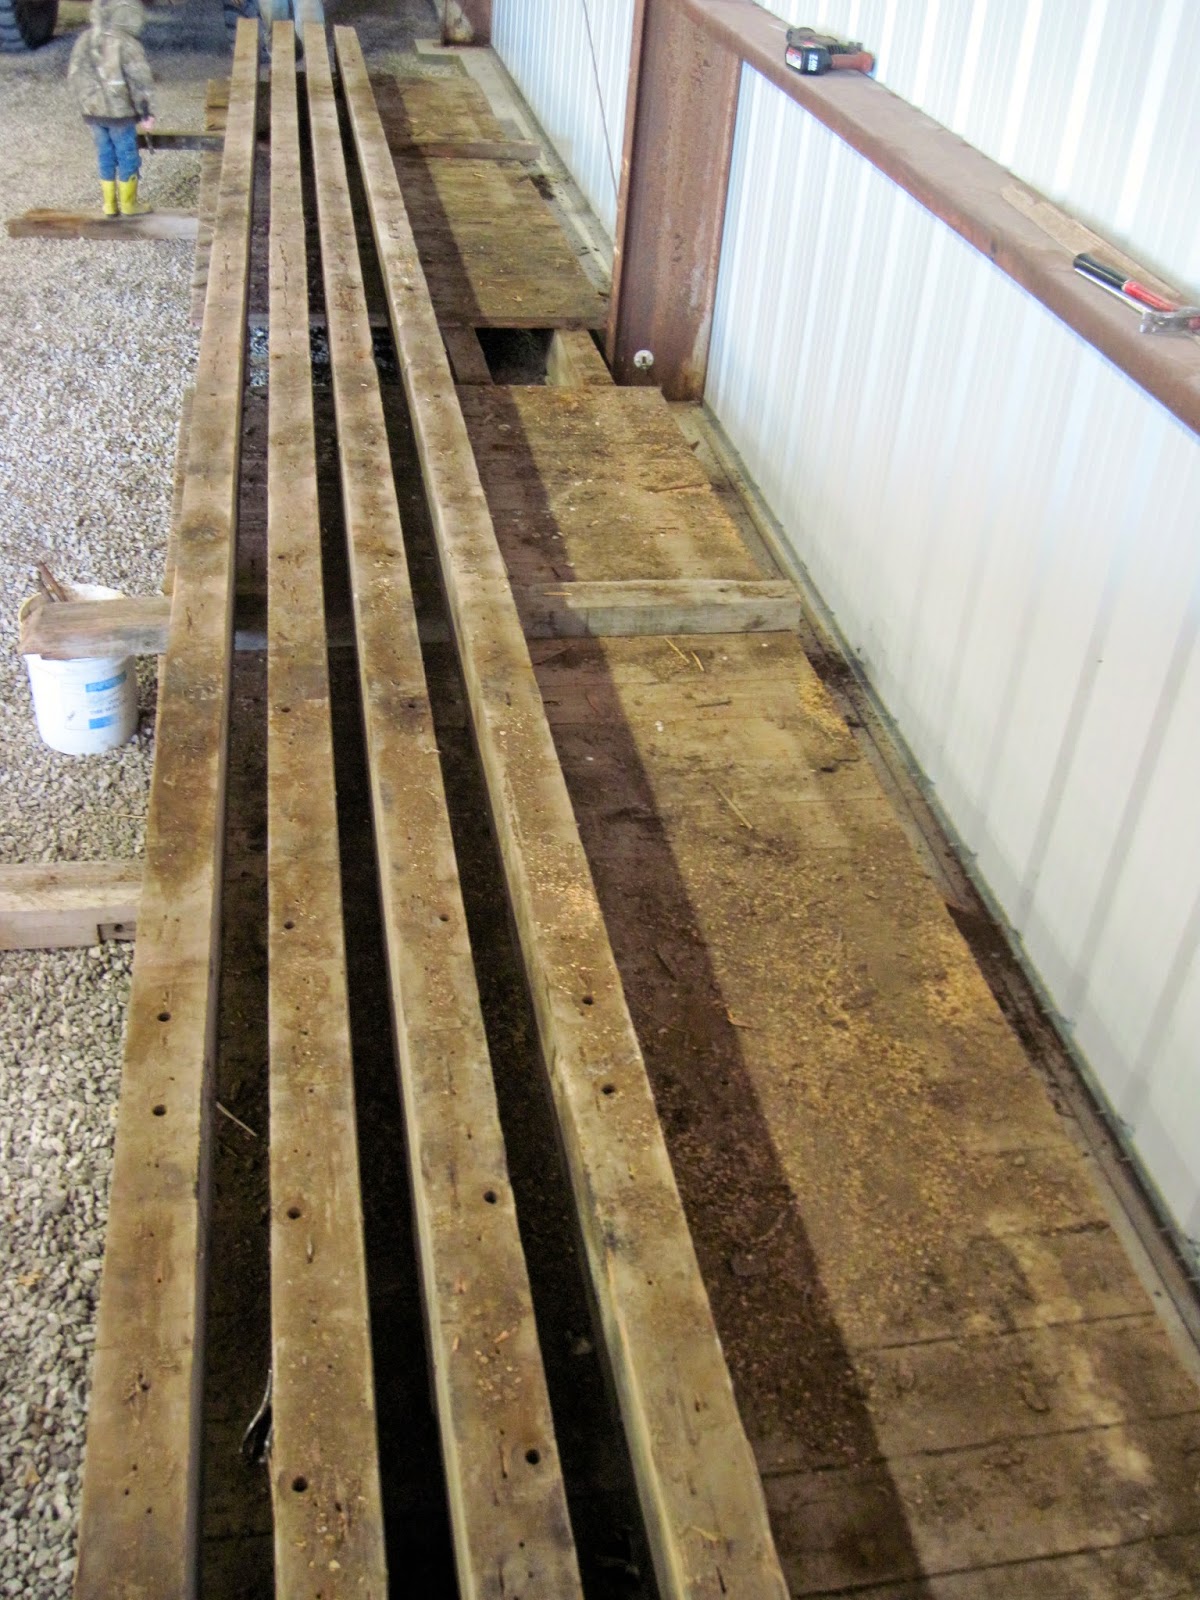
Here you can see that the boards had been removed from the top floor (the bottom one still had its boards) and there were four beams under each floor.
So that's the very beginning of this whole thing!
I'll continue to show the whole process as it happens,
I'll continue to show the whole process as it happens,
Ashleigh
No comments:
Post a Comment
Feel free to leave a comment as I love hearing from you guys! Please type nice, no rudeness or foul language, and no links.
Thanks!
Ashleigh